Here’s a streamlined guide on how to mount a qcow2 disk image on your host server/system, which can come in handy for tasks like resetting passwords, editing files, or recovering data without needing to run the virtual machine.
Step 1 - Activating NBD on the Host#
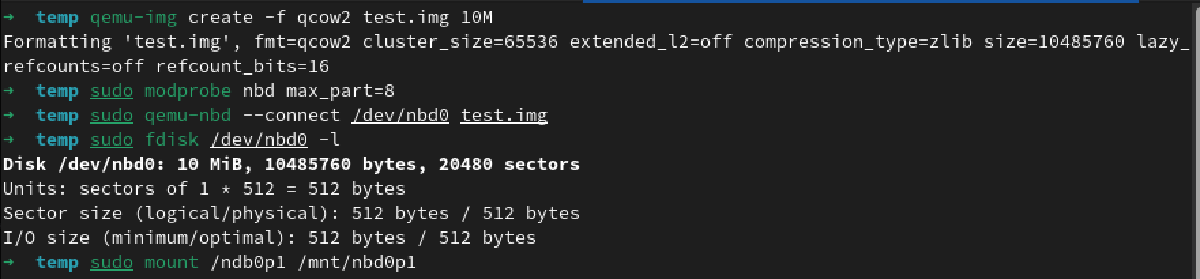
In your terminal, run the following command to enable NBD (Network Block Device) on your host (with sudo if required):
modprobe nbd max_part=8
Step 2 - Link the QCOW2 to Network Block Device#
Next, connect the QCOW2 disk image to the network block device using the following command:
qemu-nbd --connect=/dev/nbd0 /var/lib/vz/images/100/vm-100-disk-1.qcow2
Step 3 - Identify the Virtual Machine Partitions#
You can find the partitions of the virtual machine by running the following command:
fdisk /dev/nbd0 -l
Step 4 - Access the Virtual Machine Partition#
Now, to mount the partition from the virtual machine, you can use the following command:
mount /dev/nbd0p1 /mnt/my-mountpoint/
Step 5 - Wrapping Up: Unmount and Disconnect#
Once you’ve finished with the tasks, it’s crucial to unmount and disconnect appropriately. Use the following commands to do so:
umount /mnt/somepoint/
qemu-nbd --disconnect /dev/nbd0
rmmod nbd
This will effectively close off your session.